The Ultimate Move-In / Move-Out Cleaning Checklist for San Antonio Renters, Landlords, and Military Moves
- Oliver Owens
- Sep 3, 2025
- 6 min read

Updated: Jan 20
If you’ve ever packed up a place in San Antonio in late August—with the sun doing its best impersonation of a broiler—you already know: moving is chaos. Between keys, boxes, and last-minute repairs, cleaning is the task that always gets bumped… until you’re staring at a dusty baseboard and wondering how that much lint could possibly live behind a fridge.

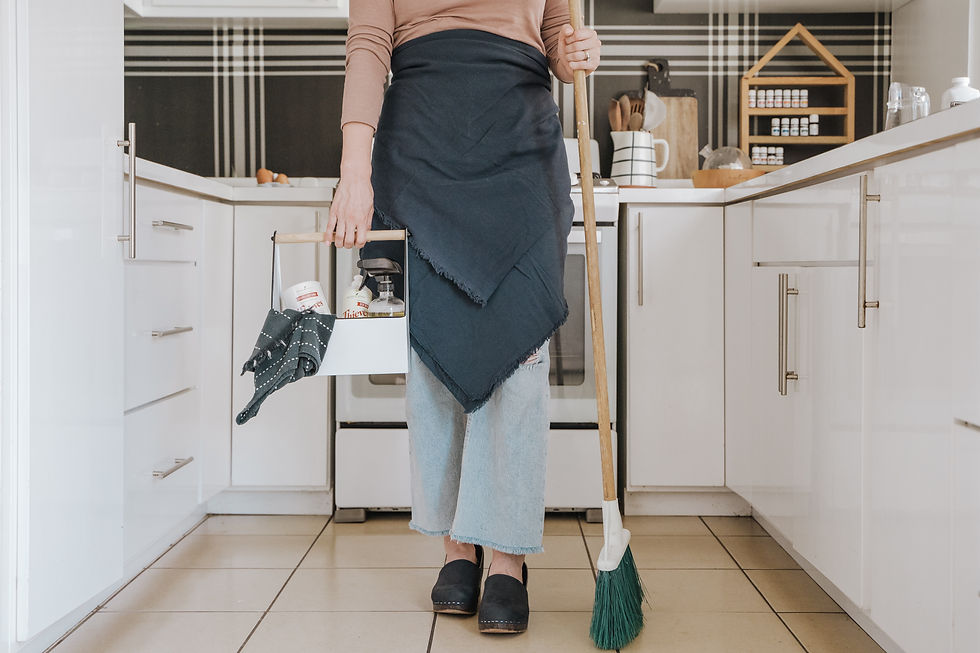
Here’s the good news. Whether you’re a renter fighting for that full deposit, a property manager trying to turn units fast, or a military family on a tight PCS schedule, there’s a smart way to tackle move-in/move-out cleaning so nothing gets missed. Below is the exact checklist our team at U B Lazy Cleaning Service follows when we do turn cleans across San Antonio—from Alamo Ranch and Stone Oak to Alamo Heights and the Medical Center.
If you decide halfway through that you’d rather hand it off, we won’t be offended. Book a pro clean and keep your day moving: see our services or contact us.
Why Move-In / Move-Out Cleaning Matters (More Than You Think)
For renters: a meticulous clean can be the difference between a full deposit and a frustrating deduction list. Landlords don’t expect “new,” but they do expect “no grime.”
For property managers: speed is money. A precise, repeatable cleaning process means faster turns, fewer complaints, and showings that convert.
For military moves: timing is everything. A clean that’s done right the first time helps you clear inspection without extra trips back.
Quick story: we once got a 6 p.m. call from a family in Terrell Hills whose movers finished late and left footprints—and an entire dust trail—straight through the living room. We sent a small crew, ran a tight checklist, and by 8:10 p.m. their walkthrough was done and approved. The secret wasn’t “superhuman speed.” It was the order of operations and not re-doing work we’d already done.
Your Room-by-Room Move-Out Checklist
Think top to bottom, clean to dirty, dry to wet. That order saves you time and keeps you from double-working the same space.
1) Kitchen: the deposit decider
Cabinets & drawers (inside/out): Vacuum crumbs first, then wipe. Don’t forget the sink base cabinet—inspectors always do.
Counters & backsplash: Degrease, then shine. Lift small appliances and wipe the “shadows.”
Appliances:
Fridge: Remove shelves, wash in the sink, wipe gaskets, dry everything before reassembling.
Oven/stove: Degrease burners/knobs; pull the unit if you can and sweep behind. Clean the oven glass inside and out.
Microwave: Steam with a bowl of hot water, then wipe. Don’t miss the vent screen.
Dishwasher: Run a hot cycle with a cleaning pod; wipe the door edge and filter.
Sink & faucet: Scrub, rinse, and dry to prevent spots. Polish stainless.
Flooring: Sweep, then mop from the far corner out. Hit toe-kicks with the mop edge.
Pro tip: Take a photo of the oven and fridge interiors before you close them. It shuts down deposit disputes fast.
2) Bathrooms: where “good enough” shows
Vent fan & light fixtures: Dust first so debris doesn’t fall onto clean surfaces later.
Mirrors & glass: Spray, wipe with microfiber, then buff with a dry cloth for a streak-free finish.
Vanity & cabinets: Empty, vacuum crumbs/hair, then wipe. Polish hardware.
Toilet: Clean bowl, hinge area, base, and shutoff valve. Wipe the wall behind it.
Shower/tub: De-soap-scum with the right product for your surface (acrylic, tile, stone). Clean the drain cover. Squeegee glass.
Sink & faucet: Scrub, rinse, and dry. Don’t miss the overflow hole.
Floor: Sweep, then mop around the base of the toilet and behind the door—two spots that always collect dust bunnies.
Smell test: after you finish, close the door for 10 minutes and walk back in. If it doesn’t smell “neutral and fresh,” you missed a spot or used too much product.
3) Bedrooms & living areas: the details that get noticed
Ceiling corners & vents: Dust from top down. Wipe return vents and fan blades.
Closets: Shelves, baseboards, and the track or hinge area. Vacuum closet floors thoroughly—lint loves edges.
Windows & sills: Clean glass inside, wipe sills/tracks, and remove any tape residue from screens.
Walls & doors: Spot-wipe scuffs, especially around switches and handles. Don’t forget the top edge of door frames.
Baseboards: Vacuum with a brush attachment, then wipe. This is the first thing a picky inspector checks.
Floors: Vacuum slowly (two passes perpendicular). Mop hard floors last, working toward the exit.
Move-in tip: If you’re arriving to a new place, do these same steps before furniture lands. It saves hours later.
4) Laundry area & utility spaces
Washer: Wipe gasket, detergent drawer, and door edge.
Dryer: Empty lint trap; wipe the door screen. If accessible, vacuum behind.
Shelving: Dust and wipe; remove detergent drips and sticky spots.
Water heater closet: Quick sweep and wipe—tenants rarely touch this, which is why it stands out when you do.
5) Entryway, patio, and garage (the “oh, right” areas)
Entry door (both sides): Clean glass, handle, and kick plate.
Patio/balcony: Sweep corners, remove cobwebs, wipe rails.
Garage: Sweep floor, corners, and ledges. Remove tape, hooks, and random nails.
Curb-appeal moment: A clean entry reads as “this place was cared for,” which sets the tone for the rest of the walkthrough.
What to Clean First (and What to Save for Last)
Start with:
Inside cabinets and appliances (so crumbs fall onto floors you haven’t cleaned yet)
High dusting (vents, fans, tops of doors)
Glass and mirrors
End with:
Bathrooms and kitchen sinks (after you’ve dirtied them cleaning everything else)
Floors (sweep, vacuum, then mop your way out the door)
Final touch: a dry microfiber pass on handles and switches
Supplies You Actually Need (keep it simple)
Vacuum with hose + brush attachment
Microfiber cloths (at least 10)
Non-scratch scrub pads & a stiff brush
All-purpose cleaner, degreaser, glass cleaner, bathroom cleaner
Grout brush or old toothbrush
Mop and bucket (or a microfiber flat mop)
Step stool for fans and vents
Heavy-duty trash bags
If you’d rather not buy all that for a one-time clean, we bring everything—and we know which product to use where so finishes don’t get damaged. If that sounds easier, tap here: book a move clean.
Common San Antonio Move-Out Mistakes (and how to avoid them)
Cleaning floors first. You’ll only have to re-do them after dusting. Save floors for last.
Skipping the oven glass and fridge gaskets. Owners check these because most people forget them.
Ignoring closet shelves. They collect a shocking amount of dust. One quick wipe changes the whole feel.
Using the wrong product on stone or stainless. When in doubt, go gentle and test a corner.
No “lights-off” check. Turn the lights off and open the blinds—streaks and missed spots show up instantly in natural light.
Move-In Cleaning: Starting Fresh the Smart Way
Even if the previous tenant cleaned, a pre-move-in reset is worth doing—especially if you have kids, pets, or allergies.
Sanitize high-touch points: handles, switches, remotes, and appliance pulls.
Run the dishwasher hot (empty) and wipe the door edges.
Fridge reset: remove shelves and wash; wipe gaskets.
Bathrooms: swap toilet seats if you want “like new” in ten minutes—it’s cheap and oddly satisfying.
Air quality bump: dust vents and replace filters on day one.
If you want us to handle this while your truck is en route, we do that all the time. We coordinate with your key exchange and send you move-in photos when we’re done. Start here: move-in & deep cleaning.
For Property Managers: Faster Turns, Fewer Callbacks
What our San Antonio PMs lean on us for:
Same-day or next-day scheduling when a lease falls through or a unit clears early
Before/after photo sets attached to your work order
Consistent checklists so every unit is “show ready” the same way
Add-ons on request: inside windows, fridge coils, wall spot-cleaning, patio refresh
If you’re juggling multiple buildings from Leon Valley to Live Oak, a dependable turn crew frees you up for the bigger fires. We can set a recurring “turn window” on your calendar so you’re never stuck hunting for help.
Let’s talk: contact U B Lazy.
Timeline Planner: How Long Will This Take?
Studio / 1 bed: 3–4 focused hours if you follow the order above
2–3 bed home: 5–7 hours depending on appliance condition and bath count
Add time for: heavy oven buildup, hard-water glass, and pet hair
Short on time? Book the pieces that take longest (kitchen + baths) and handle the easy wins yourself (closets, baseboards, final vacuum). We’re flexible—tell us what you want to keep and what you want to delegate: customize your clean.
Quick “Did I Miss Anything?” Walkthrough
Stand in the doorway of each room and check:
Do the corners and baseboards look clean without crouching?
Are switch plates and handles smudge-free?
Do the appliances open to a clean interior?
Are mirrors and glass streak-free in natural light?
Does the bathroom smell neutral (not “covered up”)?
Are the floors clean all the way to the edges?
If you can answer yes down the list, you’re in great shape.
Ready for a Clean Exit—or a Fresh Start?
You’ve got enough to do on moving day. If you hit the wall (or just want it done right, fast), our San Antonio team can jump in with a checklist that’s built to pass walk-throughs the first time.
Browse services: U B Lazy Cleaning Services
Book or ask questions: Contact Us
Local, reliable, and detail-driven. That’s the kind of clean that gets deposits back, listings rented, and new homes ready to live in.


Comments